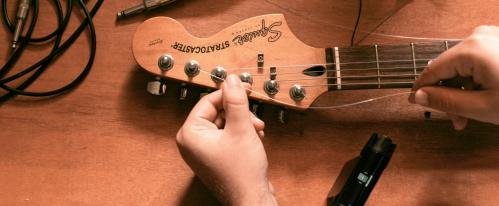
Learn how to use three different types of guitar string bends and supercharge your next solo with our lesson on the basics of string bending
String bending is a great technique to add to your guitar skill set. It’s a fantastic way to add lots of expressive pitch movements to your lead guitar lines, and it doesn’t matter if you’re new to the instrument - it’s never too early to start learning about string bending.
In this lesson we are going to look at the technique of bending a string and three common types of string bends.
The Technique
The technique of bending a string involves playing a note and pushing the string upwards (or downwards!) until it reaches the pitch of the note you are targeting.
Learning and really mastering bending is not just about your fingers but also your ears. You have to train yourself to hear the pitch distances so that you’re never bending to a note that is out of key.
When you usually fret a note you should use the tip of one finger which will be coming down onto the string. For most string bends you want to change the angle slightly so you’re coming at the string from a 45-degree angle from below. This allows you to get under the string a little more and it aids the push-up motion.
You can bend with any finger but it’s good practice to use your third finger. Check out the attached video which shows you how to support the bend with other fingers on your fretting hand. This helps spread the tension of the string across multiple fingertips.
It might be uncomfortable for the first few attempts, but persevere and you will develop the strength in your fingertips in no time.
Full-Step/Full-Tone Bends


A full-tone (or full-step) bend is when you bend the distance of two frets.
A good ear-training exercise you can use to help with your pitch recognition is to pick a note to bend - in this example the 7th fret of the G string.
You want to bend this string a full-tone distance which is 2 frets. Play the 9th fret on this string - this is your reference note. Listen to this note and remember it.
Now play the 7th fret and slowly bend it until it matches the reference pitch you’ve just heard.
Using this method you can not only train your fingers to get stronger and feel the distance of a full tone bend, but you’ll also train your ability to hear this. Keep training your ears until you can hit the note without too much adjustment. Listen carefully to prevent under or over-bending the string.
Half-Step/Semitone Bends

If you bend the distance of a single fret this is known as a half-step or a semitone bend.
You can train your ears the same way you do with a full-tone bend, except you’re only working across a single fret distance. Play the 8th fret on the G string as your target note, then bend the 7th fret to match it. This bend will require less force and should be easier to pitch.
Quarter-Step Bends


Quarter-tone bends don’t really have a reference on the fretboard, as the guitar is laid out in semitone note distances. This is something that may be used as an expressive addition to a note.
Typically you’ll see these played with the first finger, but you can play them with any finger.
To perform a quarter-tone bend you simply want to pull the string slightly as you play it. This gives a little pitch movement and adds a vocal-like quality to the scale run you’re playing. Don’t push too hard on the note otherwise it will turn into a semitone bend (or land somewhere in between and sound off-key).


