We’ve teamed up with the experts at Shure to show you how to mic up a live band and get an awesome sound at your gigs
Whether you’re a gigging musician or an aspiring audio engineer, learning how to mic up a band is essential. In this blog we’ll break down some of the best techniques that will help you to get a huge live sound, including:
- what microphones to use for a live band
- where to place microphones on different instruments and amplifiers
- how to set-up based on your performance space
We’ll also reveal some other tips and tricks directly from industry icons and microphone experts Shure that will ensure that no matter where you’re playing you’ll know exactly how to get the best sound possible.
It’s important to remember that there are no hard rules when it comes to setting up a band - so if you have any cool microphone techniques or interesting ways to capture different instruments then be sure to leave a comment.
Keep reading for a full visual guide on how to mic up a band, and watch this video for some further insight from Shure.
How To Mic Up a Guitar Cab

For a tried-and-trusted guitar sound, it’s hard to go wrong with the Shure SM57. This microphone has been used on countless records for a multitude of applications, and it’s also a great way to capture the sound of a guitar in a live environment.
Firstly, work out where the speaker cone is situated within the cabinet (or combo) that you need to mic up. Place the microphone so it is pointing slightly off-centre in relation to the cone - this ensures you are capturing a part of the speaker that is moving more air and therefore will have more detail and character.
You should also tilt the microphone away from the speaker just slightly so it is ‘off-axis’. This allows the diaphragm within the microphone to work more comfortably, as well as helping to reduce any proximity effects that can occur.
Top Tip! When you find a great mic position that really nails your guitar sound, place some tape on your amplifier that indicates where the mic is pointing so that you can set up more quickly next time.
It’s important to speak to the guitar player and get an idea of how they want the guitar to sound, and you should also take into consideration the size and shape of the venue - for many small gigs you may not need to mic up the guitar at all!
If you have time then it pays to experiment with mics too - using a second microphone can be beneficial for blending tones, especially if the cabinet has two different speakers or if the venue is particularly large. A microphone with completely different tonal qualities can be great for this, so try playing around with a condenser to achieve a mix or stereo effect. The Shure SM7B is also a great option for pairing with the SM57 in this scenario as it has a higher impedance and will offer a guitar sound with lots of options for mixing.
Using two microphones also grants you more flexibility in terms of the sound that is sent to the on-stage monitors and the sound that is heard in the audience - if the guitar player and engineer need to hear different things then two mics can really save your gig.
How To Mic Up a Second Guitar Amp
If the band has two guitar players then you can choose to use different microphones on each amp in order to get a range of sounds from the stage.
The Shure Beta 58a is perhaps best known as a vocal microphone, but it can be used to great effect on a guitar cabinet too. With a super-cardioid polar pattern and neodymium magnet you’re granted a much tighter tone that rejects sound from the sides, pushing the gain to the front of the mic and offering a brighter sound.
Again, it pays to speak to the band before setting up in order to gauge which amp might be used more for lead tones as opposed to rhythm playing - whilst some might enjoy the sound of guitars that are blended together, others may need tones that are more distinguishable from each other.
How To Mic Up a Bass Amp

Although at many gigs the bass tone is taken from a Direct Output, it can often be wise to also use a microphone. As with the guitar sound, it always pays to have some flexibility in terms of different sounds - so use a mic in addition to the DI if possible.
Here we are using a Shure Beta 52a microphone. This mic is designed to be used in scenarios where you need to handle low-frequencies which is why it’s often chosen by engineers to capture a kick drum sound - more on that later.
The bigger grill on the mic and overall construction means it’s still expertly-suited for use on a bass cabinet though, and you can see on the above illustration that it’s positioned similarly to the guitar cab microphone.
The only difference here is that you should move any mic on a bass cab back slightly in order to capture the low-frequency waves. These waves are much longer than those coming from a guitar cabinet, and this also reduces the chance of proximity effect occurring once again.
As always, remember to point the mic off-centre and off-axis in relation to the speaker cone for the fullest sound.
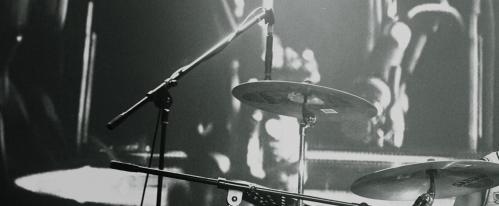
How To Mic Up a Drum Kit
Depending on the size of the venue or space that the band is performing in, a full drum mic set-up isn’t always necessary.
In a pinch there are ways to set-up using one microphone on a drum kit - including a popular method known as the “Würst” technique - but we’ll be covering a range of ways to add colour and character to your live drum sound by utilising overheads, snare mics, kick mics, tom mics, and even hi-hat mics.
In many small venues you’ll be able to simply use a Kick and Snare mic to capture the pulsing backbeat of a band - but let’s start with the overheads and get a full kit sound from the start..
How To Set Up Overhead Drum Mics

When setting up overhead mics you should use a condenser microphone. Condenser mics are more sensitive than dynamic mics and are therefore good for representing the sound of an entire drum kit when placed above it.
In this illustration you can see a pair of Shure SM81 pencil condenser mics being used. Another good choice is the Shure Beta 27 - a large diaphragm condenser that offers an abundance of top-end information, granting you a natural sound with a lesser attack.
Top Tip! There are a couple of different placement techniques when it comes to overheads, but a good rule of thumb is to keep each mic equidistant from the Snare drum - this helps to avoid phasing issues which can be common when setting up live drum mics.
How To Mic Up a Snare

The snare drum mic has to be able to reproduce sounds that have an extremely high attack, and just like with the guitar cabs we’ll be opting for the ever-reliable Shure SM57.
Point the mic off-axis to the snare in order to prevent the diaphragm from being bombarded too heavily, and aim it somewhere in between the centre and the rim of the drum.
You will also need to take into account the position of the drummer and how they play, so approaching this set-up from the front of the kit over the back of the snare is usually the preferred technique.
How To Mic Up a Kick Drum

To mic up the Kick drum we are once again utilising the Shure Beta 52a in order to capture our low-end sounds. This is a classic choice that is great at dealing with high-pressure sounds.
TheShure Beta 91a can also be placed inside of the Kick. This mic is a condenser with a half-cardioid pattern that is great for adding character to the overall sound that is produced by the Beta 52a.
Top Tip! Using two mics on the Kick drum gives you many more tonal options, but as always you should consider the room size and player before setting up. These mics should add impact to the performance, and how you approach using them will vary depending on many factors - for example, how hard the drummer hits the Kick.
How To Mic Up Toms

When choosing a mic for the Toms you should pick something that is extremely directive that can also handle high sound pressure. Tom mics aren’t always necessary in smaller venues, but if you have the time then they can add a dynamic effect and more character to the sound.
For this set-up we are using the Shure Beta 98. This mic is particularly useful on a range of percussion instruments due to its clip-on design which means it’s unobtrusive and can be positioned accurately, as well as allowing the drummer to navigate the kit more easily.
The positioning of the Tom mic is often dependent on the drummer's cymbal set-up - aim to avoid capturing too much of anything besides the Tom drum itself, and experiment with the angle of the microphone in order to capture the best and most pleasing tone.
How To Mic Up Hi-Hats

Although you will probably already have a hi-hat sound that is sufficiently captured by your overheads (and even by your snare mic), an individual hi-hat sound can be beneficial for more control over the entire drum kit.
Use a small diaphragm condenser such as the Shure SM81 and position it over the top of the hi-hat, pointing off-axis once again. The most important thing that you must avoid when positioning this microphone is the rush of air when the hi-hat is opened and closed again - if this air hits the diaphragm it will make the overall hi-hat tone sound noisy and muddy, as well as potentially causing feedback depending on your levels.
How To Mic Up an Acoustic Guitar

Setting up a mic for an acoustic guitar is more simple than you might think, and there are a multitude of techniques and methods you can use to achieve a variety of different sounds.
Here we’ve opted for the Shure SM81 once again, but other options such as the Shure KSM137 are also frequently used. The use of a pencil condenser mic pointed directly at the soundhole allows us to capture as clear a sound as possible, but care should be taken to account for monitors in order to avoid feedback. Using a microphone with a cardioid polar pattern means you can point the back of the mic directly at the monitor and avoid generating any uncomfortable squeals.
Top Tip! Even if a performer is using an electro-acoustic guitar it can be beneficial to use a microphone still - in addition to offering a blend of tones, it can also save a gig in the event that a pick-up fails or the lead is accidentally unplugged.
When setting up this mic it’s important to remember that there is not a huge amount of sound pressure, so take some time to ensure feedback is avoided whilst still aiming to reproduce the sound of the guitar as best as possible.
What Mic is Best for Live Vocals?

The darling of the live vocal sound is the Shure SM58 - it’s an industry-standard that is relied upon by countless performers, delivering a sound that is renowned for its articulation and clarity.
The Shure Beta 58 is also used, offering a tighter polar pattern that can require some changes to monitoring solutions depending on the singer.
Another option is the Shure KSM8 - described by Shure as a ‘premium SM58 for vocals’, it is designed with two diaphragms - one which is placed behind the other that faces in the opposite direction. This gives a very consistent cardioid polar pattern which makes it awesome for feedback rejection and the avoidance of proximity effects.
If a performer chooses to hold their microphone - as opposed to leaving it in a mic stand whilst playing an instrument, for example - they should grip the handle as shown in the above illustration.
Top Tip! Cupping the microphone causes colouration of the expertly-designed frequency response of the mic, as well as affecting the directionality and making it sensitive to feedback - so avoid it at all costs.
Vocal mics such as the SM58 are designed with great attention to detail in order to facilitate the best sound possible - all whilst remaining comfortable to use and tough enough to withstand the rigours of a live performance.
Some singers may have a vocal mic that they prefer to use, so work with them and figure out how to get the best from each performance.
Still not sure how to mic up a band? Need some extra help with setting up other instruments? Call us on 0151 448 2089 or check out your local store to speak to one of our Experts about your needs.